Drlogy
Healthcare organization
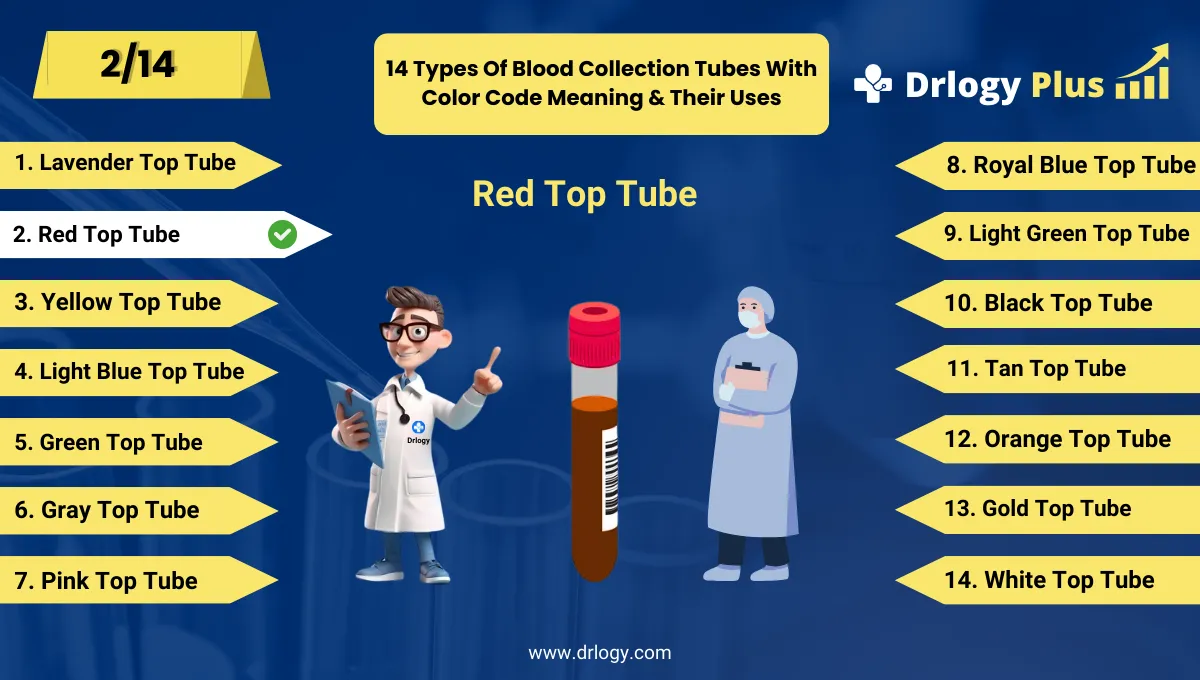
Red Top Tube – Plain Serum Tube for Chemistry & Serology
What is a Red Top Tube and How is it Used in Blood Collection?
A Red Top Tube is a type of blood collection tube used extensively in medical laboratories. It is characterized by its distinctive red cap and does not contain any additives or anticoagulants. This makes iteal for collecting whole blood that will be allowed to clot, from which serum can then be separated.
In blood collection, the Red Top Tube is typically used for serum chemistry tests, blood bank procedures, and serology. During the process, blood is drawn into the tube and allowed to sit undisturbed for about 30 minutes to let clot formation occur. After clotting, the sample is centrifuged to separate the serum from the clot. The resulting serum is then used for numerous diagnostic tests, such as measuring electrolytes, enzymes, and hormones, among others.
The Science Behind the Red Top Tube: How Does It Work?
The Red Top Tube allows blood to clot naturally, separating the serum from the clot during centrifugation, which is then used for various diagnostic tests.
How Does It Work?
- Draw blood into the Red Top Tube.
- Allow the blood to clot naturally.
- Place the tube in a centrifuge.
- Centrifuge the tube to separate the serum from the clot.
- Use the clear serum for testing.
Importance key features of a Red Top Tube
| Key Feature | Description |
|---|---|
| Additive | None (plain) |
| Color | Red-colored cap or stopper |
| Material | Made of transparent plastic or glass |
| Capacity | Typically available in various sizes ranging from 3 to 10 mL |
| Tube Type | Non-anticoagulant tube designed for serum collection |
| Compatibility | Compatible with serum chemistry tests, blood bank procedures, and serological assays |
| Clot Formation | Facilitates natural clot formation upon blood collection, allowing for serum separation during centrifugation |
| Centrifugation Requirements | Requires centrifugation to separate serum from the clot for subsequent laboratory analysis |
| Labeling Requirements | Requires proper labeling with patient details, date, and time of collection to ensure sample traceability and integrity |
| Common Uses | Widely used in clinical laboratories for serum chemistry tests, blood bank procedures, and serological assays |
Top 10 Laboratory Tests That Use Red Top Tubes
Basic Metabolic Panel (BMP): Evaluates kidney function, electrolyte levels, and glucose levels.
Comprehensive Metabolic Panel (CMP): Provides a more extensive analysis, including liver function tests, in addition to BMP components.
Liver Function Tests (LFTs): Measures enzymes and other substances produced by the liver.
Lipid Panel: Assesses cholesterol levels and other lipids in the blood.
Glucose Testing: Measures blood sugar levels, crucial for diagnosing and managing diabetes.
Cardiac Biomarkers: Detects substances released into the blood during a heart attack or other cardiac conditions.
Thyroid Function Tests: Evaluates thyroid hormone levels to assess thyroid function.
Hepatitis Panels: Screens for various types of hepatitis viruses and assesses liver health.
Serum Protein Electrophoresis (SPEP): Separates and analyzes proteins in the blood, useful for diagnosing various diseases.
Autoimmune Disease Testing: Includes tests like antinuclear antibody (ANA) and rheumatoid factor (RF) tests, aiding in diagnosing autoimmune disorders.
Best Practices for Using Red Top Tubes in Phlebotomy
- Proper Patiententification: Confirm patient details to avoid sample mix-ups.
- Selecting the Right Vein: Choose a suitable vein for blood collection.
- Appropriate Tube Size: Ensure the tube size matches the required blood volume.
- Aseptic Technique: Maintain sterile conditions to prevent contamination.
- Gentle Mixing: Invert the tube gently to mix blood and additives.
- Timely Centrifugation: Process samples promptly to prevent clotting issues.
- Proper Storage: Store tubes correctly to preserve sample integrity before testing.
11 Step-by-Step Guide to Proper Red Top Tube Usage
Prepare Equipment: Gather Red Top Tubes, needles, alcohol swabs, and tourniquet.
Verify Patiententity: Confirm patient details to ensure proper labeling and avoid mix-ups.
Select Vein: Choose a suitable vein, typically in the antecubital area, for blood collection.
Apply Tourniquet: Securely apply a tourniquet to engorge the vein and facilitate blood flow.
Cleanse Site: Thoroughly cleanse the venipuncture site with an alcohol swab and allow it to dry completely to prevent contamination.
Perform Venipuncture: Insert the needle into the vein at a 15-30 degree angle, ensuring proper depth and angle for successful blood draw.
Collect Blood: Allow blood to flow freely into the Red Top Tube until it reaches the required fill volume, typically indicated by markings on the tube.
Remove Tourniquet: Release the tourniquet once blood flow is established to prevent excessive venous congestion.
Mix Blood and Additives: Gently invert the tube several times to ensure thorough mixing of the blood with the clot activator.
Label Tube: Clearly label the tube with patient information, collection date, and time to ensure properentification and traceability.
Transport and Storage: Place the labeled tube in a biohazard bag and transport it to the laboratory for processing. Store the tube upright at the appropriate temperature until testing.
7 Common Mistakes to Avoid When Using Red Top Tubes
- Incorrectentification: Ensure accurate patiententification to prevent sample mix-ups.
- Inadequate Blood Volume: Collecting insufficient blood may affect test results; ensure proper filling of the tube.
- Delayed Centrifugation: Delayed processing can lead to clot formation or sample degradation; centrifuge promptly after collection.
- Improper Mixing: Inadequate mixing can affect serum separation; gently invert the tube several times after collection.
- Contamination: Ensure aseptic technique during venipuncture to avoid sample contamination.
- Incorrect Storage: Improper storage conditions can compromise sample integrity; store tubes upright and at appropriate temperatures.
- Overfilling or Underfilling: Overfilling or underfilling the tube can affect test accuracy; follow proper filling guidelines for accurate results.
5 Innovations and Advances in Blood Collection: The Future of Red Top Tubes
- Microsampling Technology: Miniaturized devices enable blood collection using smaller volumes, reducing patient discomfort and improving accessibility to testing.
- Integrated Diagnostic Platforms: Red Top Tubes may integrate with point-of-care diagnostic platforms, enabling rapid on-site testing for immediate results.
- Smart Tubes: Incorporation of RFID or NFC technology into Red Top Tubes allows for enhanced tracking and monitoring of samples throughout the testing process.
- Self-Sampling Kits: Innovations in self-sampling kits equipped with Red Top Tubes empower patients to collect blood samples conveniently at home, revolutionizing remote healthcare and monitoring.
- Lab-on-a-Chip Technology: Miniaturized lab-on-a-chip devices may enable comprehensive blood analysis using tiny amounts of blood from Red Top Tubes, offering faster and more precise diagnostics.
FAQS: blood collection Red Top Tube
1. Why is a Red Top Tube used for blood collection?
A Red Top Tube is used for blood collection because it contains no additives, making iteal for obtaining serum samples for various laboratory tests without interfering with the chemistry of the blood.
2. How much blood can a Red Top Tube hold?
Red Top Tubes typically come in various sizes ranging from 3 to 10 mL, depending on the specific requirements of the laboratory test being conducted.
3. Can a Red Top Tube be used for coagulation studies?
No, a Red Top Tube is not suitable for coagulation studies as it does not contain anticoagulants. Light Blue Top Tubes containing sodium citrate are typically used for coagulation studies.
4. How should I handle a Red Top Tube after blood collection?
After blood collection, gently invert the Red Top Tube several times to mix the blood with the clot activator. Ensure proper labeling with patient details, date, and time of collection, and transport the tube to the laboratory for processing.
5. Can a Red Top Tube be used for glucose testing?
Yes, a Red Top Tube can be used for glucose testing as long as the sample is processed promptly to prevent glucose utilization by blood cells. However, Gray Top Tubes containing sodium fluoride and potassium oxalate are more commonly used for glucose testing.
6. How long can blood samples in Red Top Tubes be stored before testing?
Blood samples in Red Top Tubes should be processed promptly to prevent clot formation or sample degradation.eally, samples should be processed within 2 hours of collection. If immediate processing is not possible, samples can be stored at room temperature for up to 24 hours or refrigerated for longer storage.
7. Are there any special considerations for using Red Top Tubes in pediatric patients?
When collecting blood from pediatric patients using Red Top Tubes, it's essential to use appropriate needle sizes and ensure proper venipuncture techniques to minimize discomfort and the risk of hematoma formation. Additionally, pediatric samples may require smaller volume collection tubes to avoid excessive blood loss.
Drlogy Blood Cllection Tube Guide
Here are 14 types of blood colelction tubes with color.
Conclusion
In the realm of blood collection, the Red Top Tube stands as an enduring symbol of precision and reliability. Its evolution reflects the continuous pursuit of excellence in medical diagnostics, adapting to the changing landscape of healthcare. As technology advances and innovation drives progress, the Red Top Tube remains a steadfast ally, ensuring accurate diagnoses and quality patient care.
Check Complete Guide on Drlogy Blood Collection Tubes with Color Codes & Uses to master phlebotomy techniques, improve sample handling, and reduce pre-analytical errors